
Who uses this: Admins, Team Managers, and Service Agents — Assignment Users and Limited Agents don’t have access to Engage. Availability: United States and Canada · Engage add-on.An Engage report shows your call activity over a date range — who answered, whether each call was incoming or outgoing, the outcome, the duration, the lead source, and more. You build the report from the Reporting tab in Engage, then choose the columns and filters that answer the question you’re asking.
Overview
The Engage report shows how your team handles calls instead of leaving you to guess. Set a date range and run the report, then narrow it with columns and filters — for example, calls by the user who answered, missed calls over a period, or calls tied to a specific lead source. The report reads Engage call data, so every incoming and outgoing call on your Engage lines is available to report on.Video walkthrough
Watch a start-to-finish walkthrough of building an Engage report, then follow the written steps below.Video walkthrough: Creating an Engage report
Before you begin
- Engage must be enabled on your account. Contact the FieldPulse team through the in-app chat or at support@fieldpulse.com to turn it on — see Engage Overview.
- You need a role with Engage access — Admin, Team Manager, or Service Agent. See Engage User Roles Details.
Create an Engage report
- In Engage, open Settings and select the Reporting tab.
-
Select the calendar icon and choose the start and end dates you want to report on.

- Select Columns to choose which columns appear in the report. See the Default columns table below.
- Before running the report, select the Filters icon to narrow the results. See the Filters section below.
- Select Run Report.
Default columns
The Engage report includes these columns by default. Select Columns to turn any of them on or off.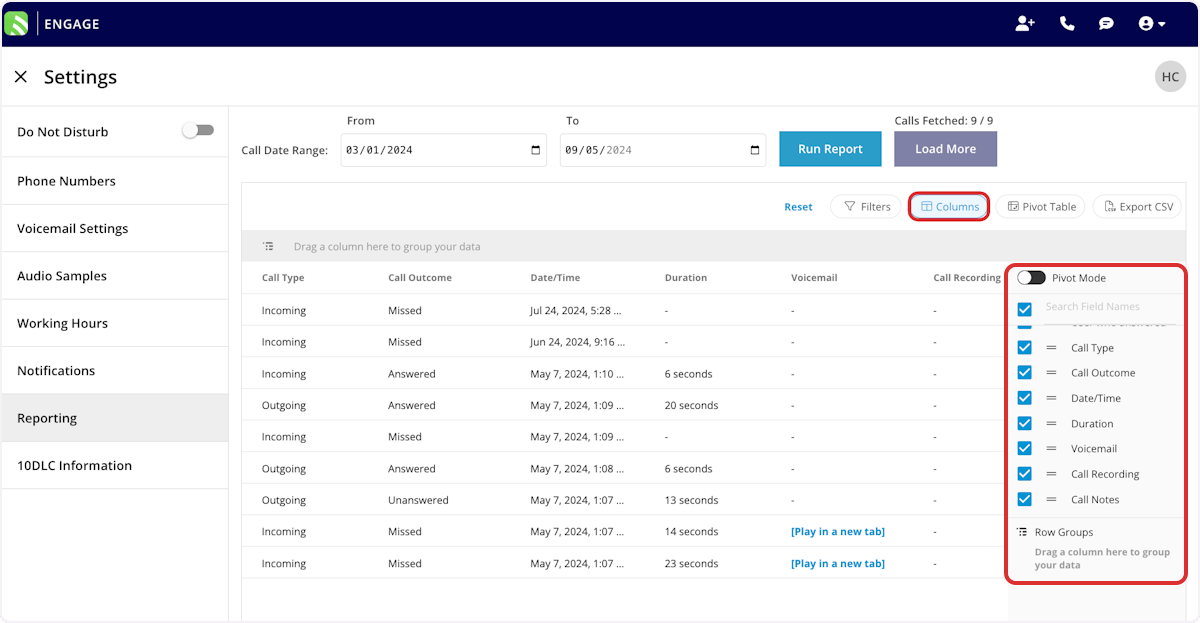
Related Records
The Related Records columns show the records linked to each call. Turn them on from Columns:
- Primary Call’s Phone Number: the phone number of the record’s primary call
- Primary Record ID: the primary linked record’s ID, as a clickable link to that record
- Primary Record Status: the primary record’s current status
- Primary Record Amount: the primary record’s total amount, populated only when the primary record is an Estimate or Invoice
- Other Related Records: every non-primary linked record
- Primary Record’s Related Invoice Status: the status of the primary record’s most recently created child invoice
- Primary Record’s Related Invoice Amount(s): the total amount of the primary record’s child invoice(s), added together if there’s more than one
- Primary Record’s Related Proposal Amount: the primary record’s child Estimate amount, added together if there’s more than one
Filters
Set filters to narrow your results. From the Filters icon, choose how to filter each field: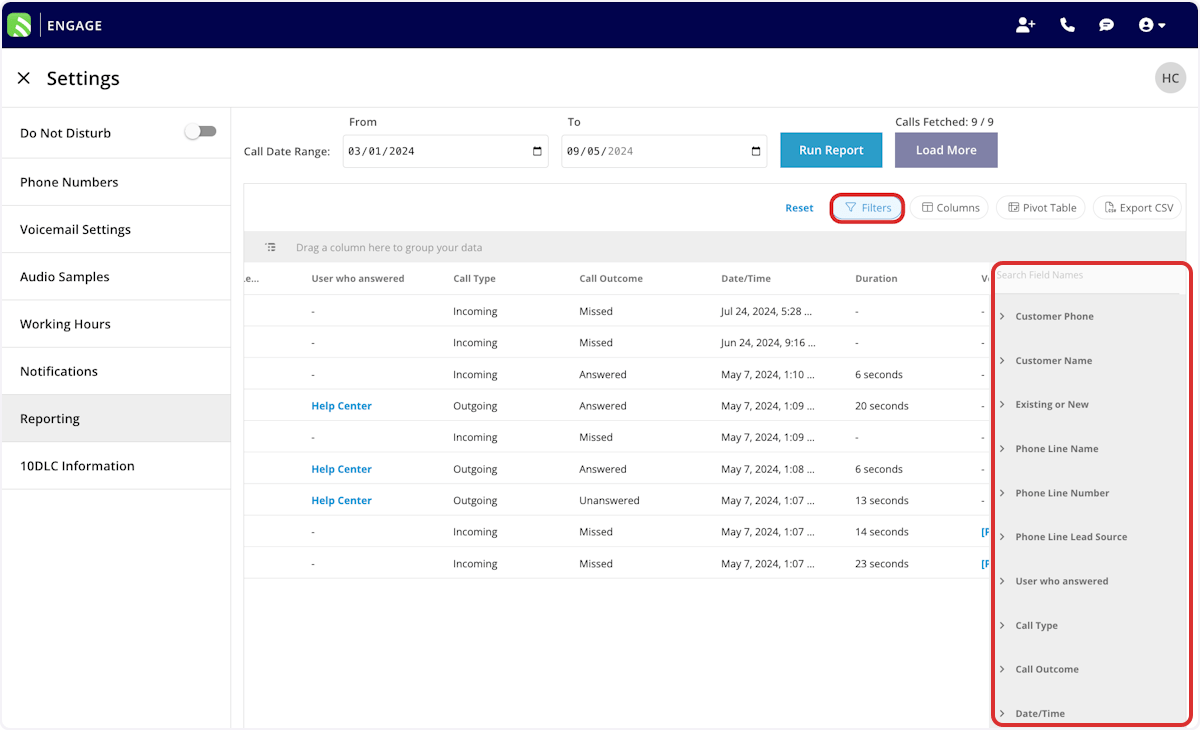
When you filter by contents, choose an operator and then enter the values to match. The operators work the same way across FieldPulse reports, so some examples below use fields from other reports:
Your Engage report is working when you set a date range, run it, and the columns and filters you chose narrow the call data to the exact question you’re answering — like which lead source drove the most answered calls last month.
Report on revenue by phone line
Find out how much revenue each of your Engage phone lines produced by grouping your report by the phone number of each record’s primary call. Revenue comes from records linked to calls, so this report shows which lines are bringing in paid work, not only which lines get the most calls. Each record’s amount is credited to the phone line of its primary call. When a record is linked to more than one call, only the primary call counts toward a line’s total. See How to Link Calls to Records in Engage for how to choose a primary call.- In Engage, open Settings and select the Reporting tab.
- Select the calendar icon and choose the start and end dates you want to report on.
- Select Columns and turn on Primary Call’s Phone Number and Primary Record Amount.
- Select Run Report.
- Sort or group the report by Primary Call’s Phone Number. Each phone line’s records appear together.
- Add up the Primary Record Amount values for each phone number to see that line’s total revenue.